By alx: June 2020 | last update: July 2020
Spring security with Keycloak
using OAuth 2.0
Goal
After seeing how to use spring security, spring security, and keyloak in conjunction with keycloak adapter we were looking for other possibilities to use keycloak without having such a tight-binding. To be precise, we want to use Spring Security's own oauth2/oidc capabilities, keycloak should act as an external Authorization Server. In this tutorial, we have a Spring boot application that provides a REST API and at the same time acts as a resource server. According to OAuth2 specsResource Server:Resource server usually needs some sort of information access token to decide if access should be granted. In order words, the RS gets the access token from the HTTP request exactly from Authorization header and validates it, and if valid, serves the request. Resouce server supports protecting endpoints using two sorts of OAuth 2.0 Bearer Tokens:
The server hosting the protected resources, capable of accepting and responding to protected resource requests using access tokens
- JWT
- Opaque Tokens
Used technologies
Keycloak 8.xJava 11
curl 7.66
Maven 3.x
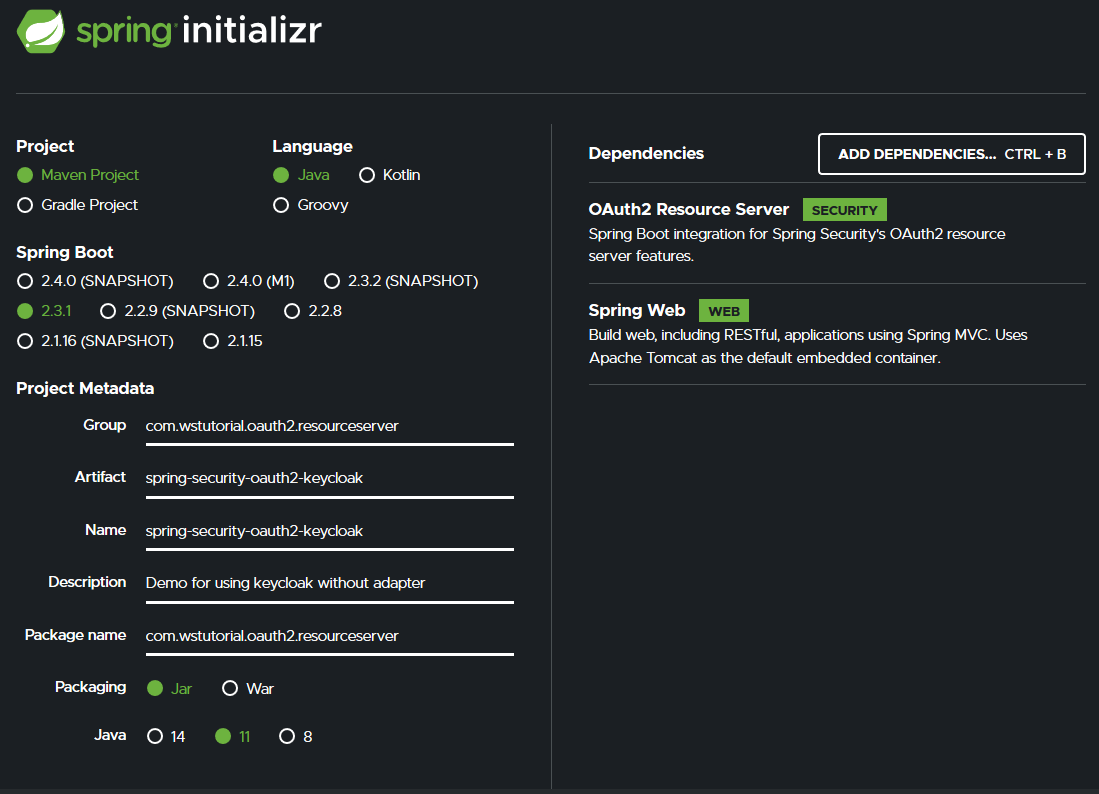
jq 1.5 Go to Spring Initializr and create a demo maven project as following:

Needed dependencies
The
spring-boot-starter-oauth2-resource-server contains other dependencies such as oauth2-jose, which contains Nimbus, a library for handling JWT. The spring-boot-starter-web is also needed because Spring Security internally rely on filters.
JWT Payload
There is one important thing in this JWT, it contains the claim
scope. As we can see Keycloak's client has by default profile and email as values.
Security configuration
@EnableWebSecurityist not necessary. Spring Security is on the classpath, hence EnableWebSecurity will be added automatically- In order to validate the JWT NimbusJwtDecoder needs a JWK set endpoint
jwkSetUri, you can also pass a public key or a secret instead - Using jwkSetUri means the Authorization Server must be all the time up and running
- All endpoints are restricted and require an Authentication
- The url
/protectedrequires additionally a scope with value=profile - The url
/adminrequires additionally a scope with value=manage - On line 12 the OAuth2 Resource Server support is enabled with a default setting
By default, Spring security will internally transform the jwt scope or scp claim into a list of granted authorities, prefixing each scope with the string
SCOPE_
The proctected API
Let's test
- Because all endpoints are restricted we had to pass an access token
- The first call was granted
- The second call requires that the scope must contain
profileas value, this call was also granted
- Calling the path
/adminreturns 403 Forbidden, the scope in acceess token does not have enoughprivileges - The Resource Server expected a scope with
manageas value
Change scopes in Keycloak
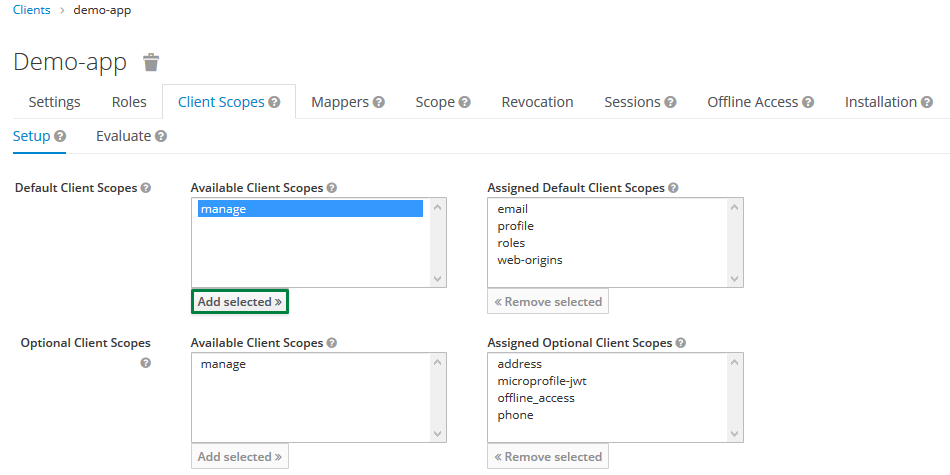
To add a scope to the client click onClients in the left menu bar. Now on the right side pick up demo-app, a new page will appear. Go to the Client Scopes tab.
 Select manage and click Add selected.
The scope claim looks now like:
References
The complete code can be found in GitHub